We all receive Out of Office messages from every email campaign we run. Yet how many of us actually process this information so that we keep our marketing databases up to date? Are we missing extra phone numbers, emails confirming named deputies and alternative contacts who might be of interest for our business development discussions?
There are services which can “batch process” these messages (ask us for more information here if you’re interested), but there is an alternative option using Outlook. This will convert your Out of Office messages into Excel in seconds. Once in Excel, the data is far easier to filter, process and add back into your marketing databases (easier than copying and pasting from each individual email message).
Just follow these 10 easy steps to ensure you make the Out of Office messages add value to your ongoing marketing campaigns.
Step 1: Create a new folder within your Outlook and name this “Out of Office Messages” – or something easily identifiable.
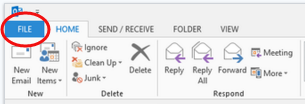
Step 2: Select FILE from Outlook’s main menu.
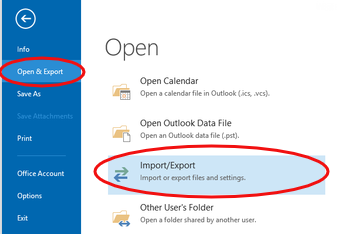
Step 3: Choose “OPEN AND EXPORT” and “IMPORT/EXPORT”.
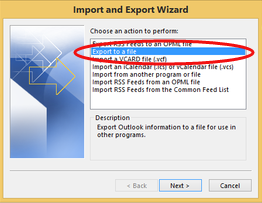
Step 4: Select “EXPORT TO A FILE”. Click next.
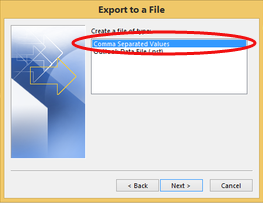
Step 5: Select “COMMA SEPARATED VALUES” to have your data exported in a CSV/Excel format. Click next.
Step 6: Select the file which you’ve just created and saved all your Out of Office messages in. Click next.

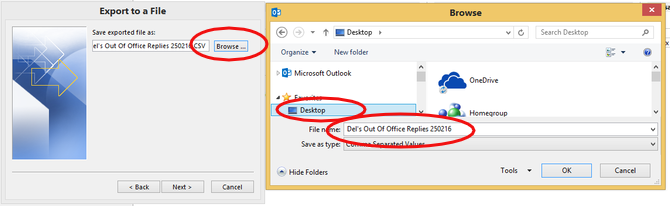
Step 7: Select “BROWSE” to confirm the location where you would like your exported file to be saved to – Desktop (or your preferred folder) – and name your file so that you can easily find it again once the export is complete. Click next.
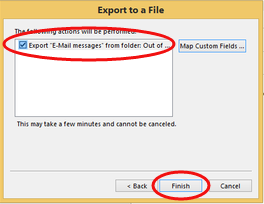
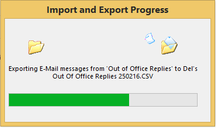
Step 8: The final message from Outlook will confirm the export file choice you’ve made. Once you’ve clicked finish you’ll see the progress bar confirming the export process.
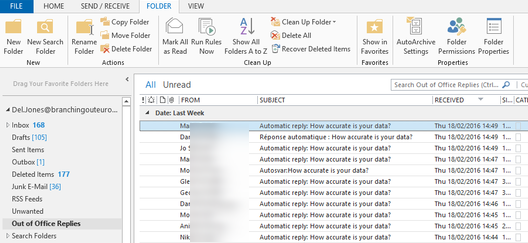
Step 9: Locate the exported file in the folder you’ve saved it to. When you open it, you will see that all of the Out of Office messages have been downloaded into the Excel CSV file. You should see the data in the image below:

SUBJECT: is the subject line of the email you originally sent.
BODY: is the detail of the Out of Office message generated. This is your “gold-dust” information! Telephone numbers, names and emails of colleagues, mobile numbers etc. It’s far easier to cut and paste this information from the Excel file than from the individual emails as received in Outlook.
FROM: the name of the person who sent the OOO message.
EMAIL: the email address of the person from whom the OOO message came – this might be important to map and import the extra information back into your CRM or email marketing platform.
TO: is your name or the name from whom the original email was sent. Filtering on SUBJECT and TO will allow you to sort the OOO messages by campaign if you’ve bundled OOO responses from a number of campaigns to do this export.
By simply creating extra columns in this spreadsheet you can easily and quickly capture new office phone numbers or mobile numbers or add new rows to capture new colleagues’ details. This can then be imported back into your CRM or email marketing database.
Step 10: Remember to resave this file from its source CSV format to an Excel Workbook format so that any changes made are captured.
Maintaining your marketing data is key and using the Out of Office feedback is an important part of this process.
If you have any other questions or would like help with your marketing campaigns, please contact the Branching Out Europe team using one of the following methods: